
I aquí teniu un altre dels projectes que tenia a mitges des de fa la tiiiiira... De fet, ja us vaig parlar del tema en el post d'aquests cistells de ganxet fa gairebé un any!!!
Em passa sovint, que enceto un munt de coses i després em costa rematar... què hi farem!! :P
La qüestió és que ja fa temps que volia posar un mirall al nostre rebedor i alhora trobar alguna solució per tenir a mà les claus i altres coses de l'estil, però que ocupes molt poc espai perquè el nostre rebedor és molt mini...

Per si voleu fer-ne un de semblant, aquí us deixo els materials i procediment que hem seguit...
Materials:
- Un mirall (en el nostre cas de 60x75cm) i els seus suports, nosaltres el vam comprar al Leroy Merlin
- Un llistó de fusta d'abet sense tractar, comprat al mateix lloc i de, com a mínim 1,5m de llargada
- Betum de Judea
- 3 penjadors, nosaltres els vam comprar al Tiger
- 3 cistells com els que us explicava aquí
- Serra, trepant, paper de vidre i cola per enganxar els llistons al mirall
Procediment:
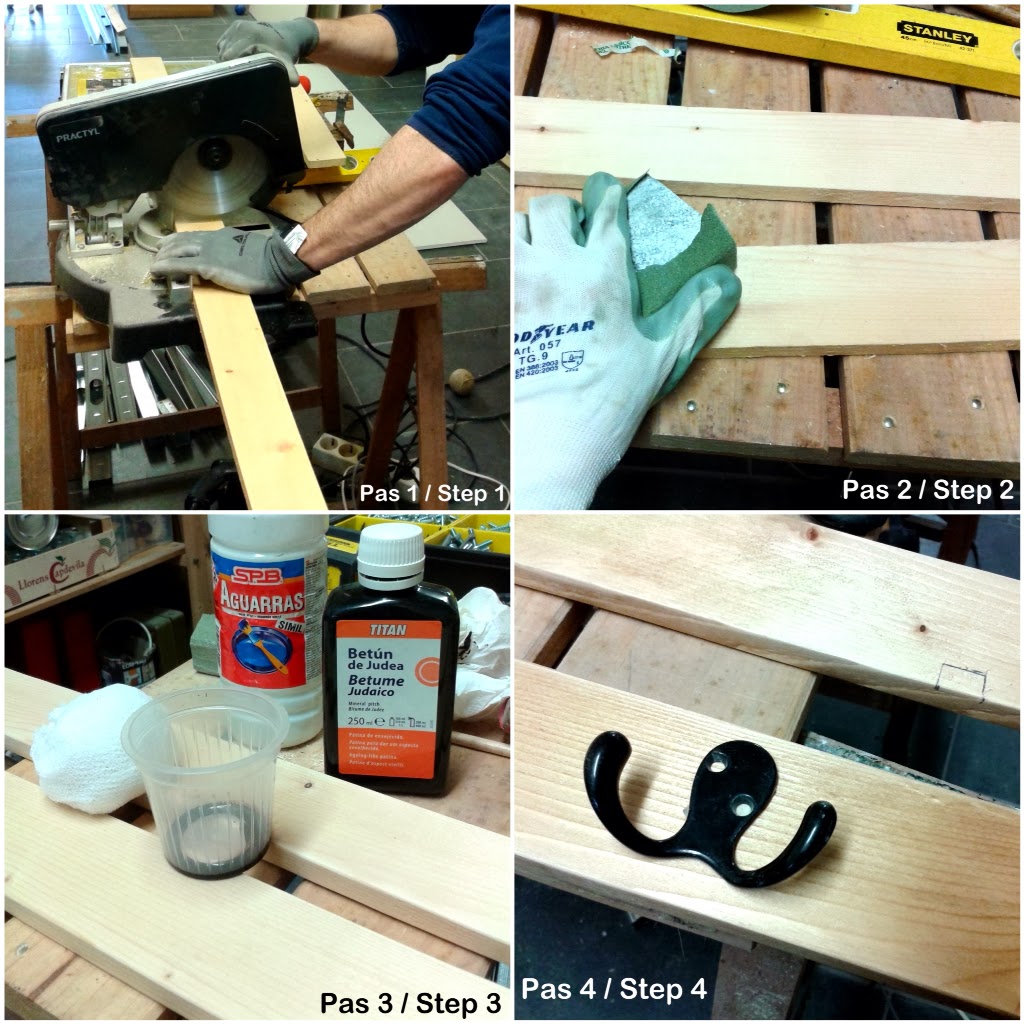
- Talleu dos trossos de llistó de 75 cm de llargada.
- Poliu tots els costats dels llistons amb paper de vidre.
- Tenyiu els llistons amb betum de Judea (diluït en aiguarràs), per a què agafin un aspecte de fusta envellida.
- Cargoleu els 3 penjadors en un dels llistons.
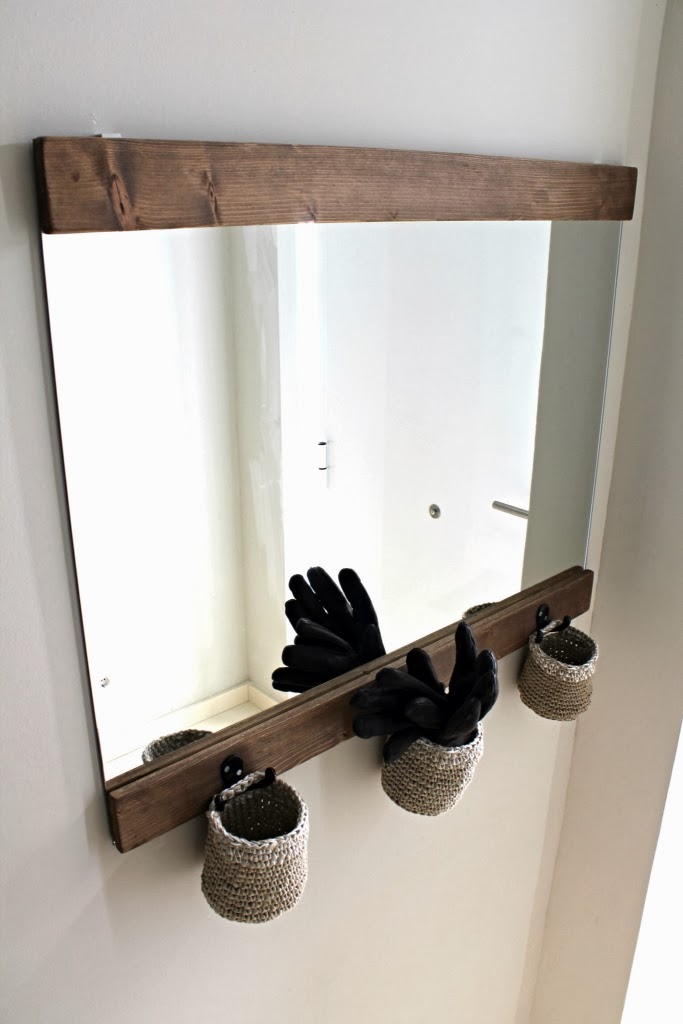
- Pengeu el mirall i enganxeu els llistons a la part superior i inferior, de manera que els suports del mirall quedin amagats a sota (jo vaig haver de fer unes mossegades a la part posterior dels llistons, perquè els nostres suports sobresortien una mica del mirall).
- Espereu el temps d'assecatge indicat per la cola i ja podeu penjar els cistells als penjadors i començar a fer servir el vostre mirall!!
Consti que en aquest projecte vaig tenir la inestimable col·laboració de la meva parella... jo amb la serra i el trepant sóc un zero a l'esquerra!! :P
Què us sembla??
-----
And here you have another project I've been postponing for months... Actually, I already told you about it in this post about my twine crochet baskets almost one year ago!!!
It happens to me all the time... I start a dozen different things at the same time and then I seem unable to finish any of them... LOL!!

The thing is that I wanted a mirror for our entryway and some solution to store our keys and other little things, but taking into account the tiny size of our entryway...
Just in case you would like to make something similar, here you have the materials we used and how we proceeded.
Materials:
- A mirror (ours is 60 x 75 cm) and its supporting elements
- An untreated fir wood strip, at least 1,5 m long
- Wood stain
- 3 hangers
- 3 crochet baskets as the ones I showed you here
- A saw, a drill, sandpaper and glue
Instructions:
- Cut two pieces 75 cm long from the wood strip.
- Sand all the surfaces of the wood pieces until you get a smooth finish.
- Stain the two pieces of wood.
- Fix the 3 hangers in one of the stained pieces of wood.
- Hang the mirror in the desired place and glue the two pieces of wood so the supporting elements of the mirror remain hidden beneath the wood strips.
- Wait until the glue hardens, and you're ready to hang the crochet baskets and start using your mirror!!
I must say I had some (much!) help of my partner in this project... because I seem to be useless when it comes to using a saw or a drill!! LOL
What do you think about it??
Q la teva parella hi te la ma trencada !!! ;-)
ResponEliminaI tant!!!!!! :P
Elimina